

User guide Lectures and slides
Lectures and slides
Open any PDF in a module to read it, write on it, and keep the board photos and voice notes from that lecture in order.
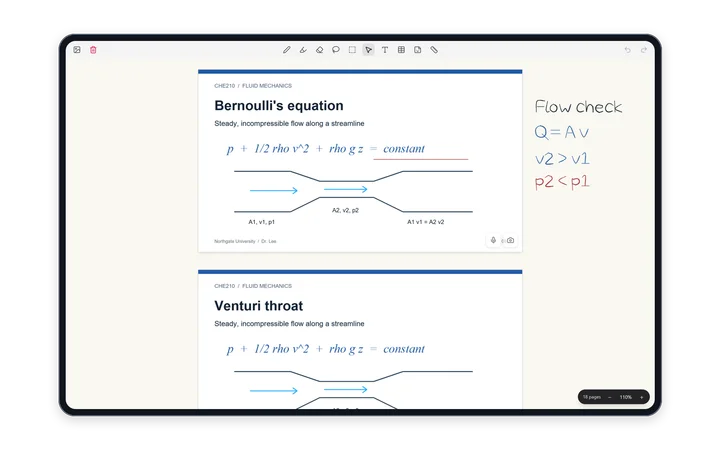
Page view and Canvas view
A switch at the top of a lecture changes between the two.
| Page view | Canvas view | |
|---|---|---|
| Layout | One page after another, for reading | Every slide on one wide sheet, with margins to write in |
| Writing | On each page | Anywhere, margins included |
| Tools | Mouse, pen, highlighter, eraser, undo, redo and clear page | Almost every tool, including the lasso, text, tables and the ruler |
| Scratchpad | Yes | No |
| Board photos and voice notes | No | Yes |
| Length | Any | Up to 99 pages |
A PDF over 99 pages opens in Page view, with the message “This PDF is too long for Canvas view — opening it in Page view instead.”
Zoom and move around
- Zoom from 40% to 300% with the zoom buttons, a pinch, Ctrl/⌘ with + or −, or Ctrl/⌘ with the scroll wheel.
- Tap the zoom number to go back to 100%. In Canvas view it can also fit the slide to the window.
- Maximize Slide gives the slide the whole window. Restore Layout brings everything back.
- Tap the title at the top to switch to another material in the module.
- The … menu holds what doesn't fit on the bar: Screenshot to Canvas, Flashcards & Summary, Open Another Slide Beside and Maximize Slide.
The toolbar fits its window. As space runs out, tools fold into a More tools menu, while undo and redo stay on the bar. See Pen and tools.
Open two or three decks side by side
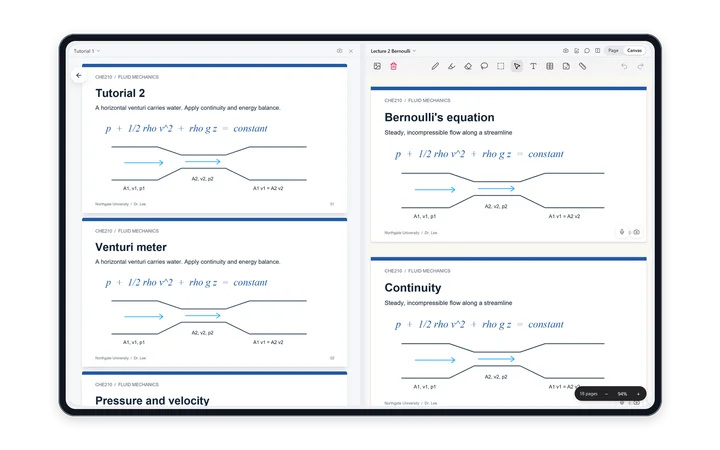
- Open the … menu and choose Open Another Slide Beside.
- Pick a PDF from the module. It opens on the left, with your main lecture on the right.
- Do it again for a third. The left side splits into top and bottom.
- Drag a divider to resize, anywhere from 15% to 85%.
- Each extra window has its own title, Change this window, Back to what it showed before, and Close.
- In split view, the Materials button opens the materials list in a floating box.
Screenshot to Canvas
Copy what you can see, ink and pictures included, onto your main lecture as a picture. Use Screenshot to Canvas in the … menu, or Screenshot → main canvas on a split window. The picture can be moved, resized, cropped and written on like any other. It's a quick way to put a worked example from the tutorial sheet next to the lecture slide.
Board photos between slides
A photo of the whiteboard can go between two slides as its own card, so the deck follows the lecture in order.
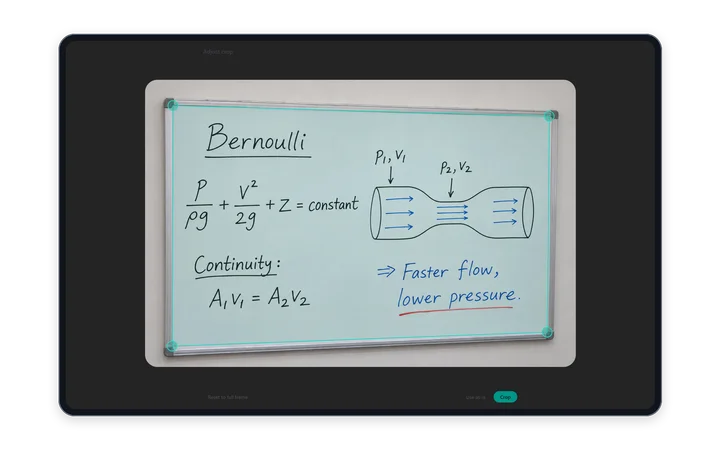
- In Canvas view, tap the camera button at the bottom corner of the slide the photo should follow. Its label is Add a photo under this slide.
- Pick one of the module's photos New in 1.1, or tap Choose from Your Files for one that isn't in the module.
- PolyNotes finds the board's four corners. Drag any corner to the board's real edge.
- Tap Crop to straighten it into a flat rectangle. Use as-is keeps the whole photo, and Reset to full frame starts again.
- You can write on a board photo and put pictures on it, like a slide.
- Your notes further down the deck move with it, so nothing ends up in the wrong place.
- To remove one, pick the Mouse tool, tap the photo, and remove it.
- Photos are made smaller before they're stored, so they don't fill your device.
Add a photo from the module New in 1.1
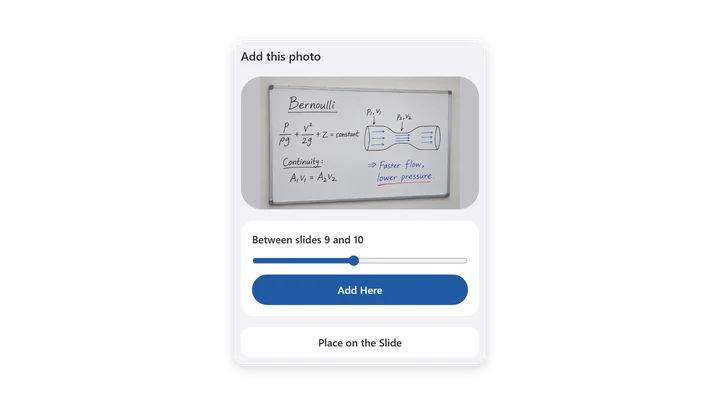
Photos taken on your phone during class wait in the module's gallery. When you pick one, PolyNotes asks where it goes:
- Add Here puts it between slides, as a board photo. A slider picks which slide it follows.
- Place on the Slide drops it on the slide as a picture you can move, resize and crop.
You can also tap a photo in the module's gallery to add it to the lecture that's open.
More in Canvas view
- Add a picture from your files or the module's photos, or paste one with Ctrl/⌘+V. A pasted picture lands in the middle of the view.
- Clear deck removes all your notes from the deck. It asks first.
- Scrolling glides to a stop, like it does in Apple's apps.
Voice notes on a slide
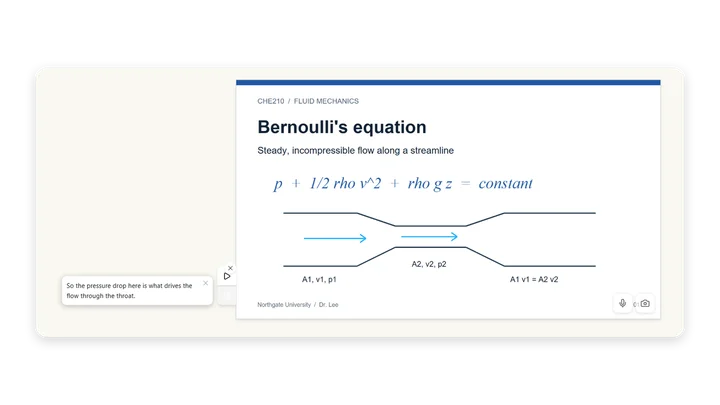
- In Canvas view, tap Record a voice note for this slide on the toolbar.
- Talk, then stop. The microphone switches off as soon as you stop.
- The recording appears as a small tab on the left edge of that slide, with Play/Pause and, on Windows, Transcribe.
You can delete a voice note, or hide its transcript. A transcript joins the module's AI search, so the tutor can answer from what was said. See Transcribe voice notes.
The scratchpad (Page view)
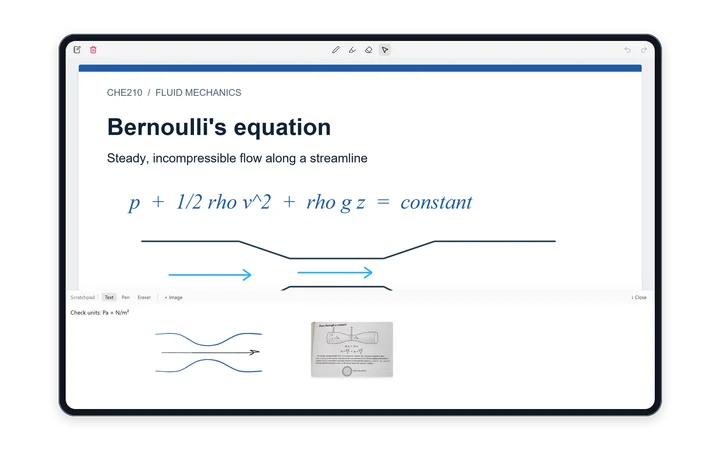
- Pull the scratchpad up from the bottom with its toolbar button. Each lecture has its own.
- Type, draw, and drag images into it. It remembers its height.
- Images can be up to 2 MB each, 10 MB in total. When it's full it says “Scratchpad is full. Delete an image to free space.”
Lectures on a phone New in 1.1
A phone opens the same lecture with a simpler toolbar. See Open a lecture on your phone.
Something wrong or missing on this page? Email support@polynotes.me.